
Table of Contents
- The Real Problem with Old Photos Nobody Talks About
- What AI Is Actually Doing to Your Photo (Not What You Think)
- Real-ESRGAN: The One That Actually Works on Messy Photos
- GFPGAN: Great for Faces, Weird When It’s Not
- SwinIR: The Overachiever Nobody Talks About
- SRCNN and Waifu2x: Two Models Worth Knowing
- Head-to-Head: Which Model Does What
- Stop Picking Randomly: Here’s What Fits Your Use Case
- The Honest Limitations Nobody Puts in These Articles
- Final Verdict
The Real Problem with Old Photos Nobody Talks About
Pull out any photo from the 1970s or earlier and look at a face in it closely. There’s a good chance the eyes are soft, the skin is a flat grey smear, and whatever expression that person was making is basically lost. Not because the photo got damaged. Just because that’s what film looked like at that resolution, with that lens, in that light.
That’s the part most AI photo restoration articles skip over. They focus on scratches and tears like those are the main problem. They’re not. The bigger issue is that the original detail was never there to begin with, and you’re asking a model to invent something plausible based on what faces typically look like. That’s not restoration. It’s closer to educated reconstruction.
That distinction matters a lot when picking which model to use. Some handle this carefully. Others go too far and produce faces that look almost right but slightly off in a way you can’t quite place. This article will be straight with you about which is which.
What AI Is Actually Doing to Your Photo (Not What You Think)
The explanation you’ll find everywhere goes like this: “AI analyzes the damage, then intelligently fills it in.” Technically true, practically useless for understanding what’s actually happening under the hood.
Here’s a more honest version. Most of these models are CNN or GAN-based architectures trained on huge datasets of degraded and clean image pairs. The model sees a damaged image, tries to produce a clean version, compares its output to the real clean version, and adjusts itself based on the error. After millions of these training rounds it gets good at guessing what clean looks like given damaged input.
The key word is guessing. The model doesn’t know what your grandmother actually looked like at 25. It knows what faces statistically tend to look like. When it fills in a blurry eye it’s producing the most plausible version of an eye given the surrounding pixels, not recovering something that was there. For most use cases this works well. For faces with strong individual features it can sometimes produce someone who looks like a close relative of the person you’re actually trying to restore.
The pipeline across most models follows the same general shape:
- Degradation detection: the model identifies what kind of damage is present: noise, blur, compression artifacts, low resolution, or physical damage like scratches
- Feature extraction: CNN layers break the image into edges, textures, and shapes at multiple scales
- Hallucination (yes, that is the real technical term): the model generates plausible high-frequency detail for areas too damaged or too low-res to recover directly
- Upsampling: the output gets scaled up while trying to maintain the sharpness of the reconstructed details
Different models handle each step differently, which is exactly why picking the right one for your specific photo type actually matters.
Real-ESRGAN: The One That Actually Works on Messy Photos
Most super-resolution research before Real-ESRGAN was trained on artificially degraded images. Take a sharp photo, apply a known blur, train the model to reverse it. The problem is real-world photos don’t degrade that cleanly. They have JPEG compression artifacts layered on top of blur layered on top of noise layered on top of film grain. That cocktail broke most older models.
Real-ESRGAN was specifically trained on complex, messy, real-world degradation patterns. That’s what the “Real” in the name actually refers to. It handles the ugly combination of artifacts you get from a photo that’s been scanned, compressed, printed, scanned again, and uploaded to Facebook in 2009. That specific destruction pipeline is exactly what it was built to deal with.
It’s also lightweight enough to integrate into mobile apps and web tools, which is why you’ll find it running under the hood of many consumer restoration products without them mentioning it by name.
Use it for: General purpose restoration, developer integrations, photos with complex multi-layer damage, anything that’s been through a rough compression history.
Watch out for: Over-smoothing fine textures on very old film photos if you push the enhancement level too high. Run it at moderate settings first and compare.
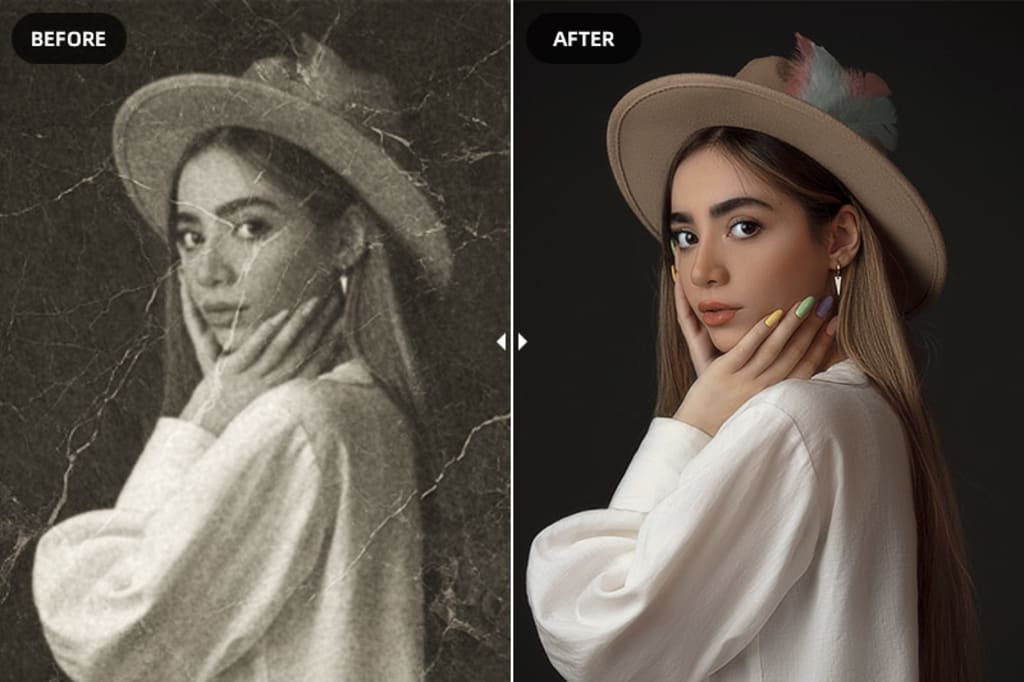
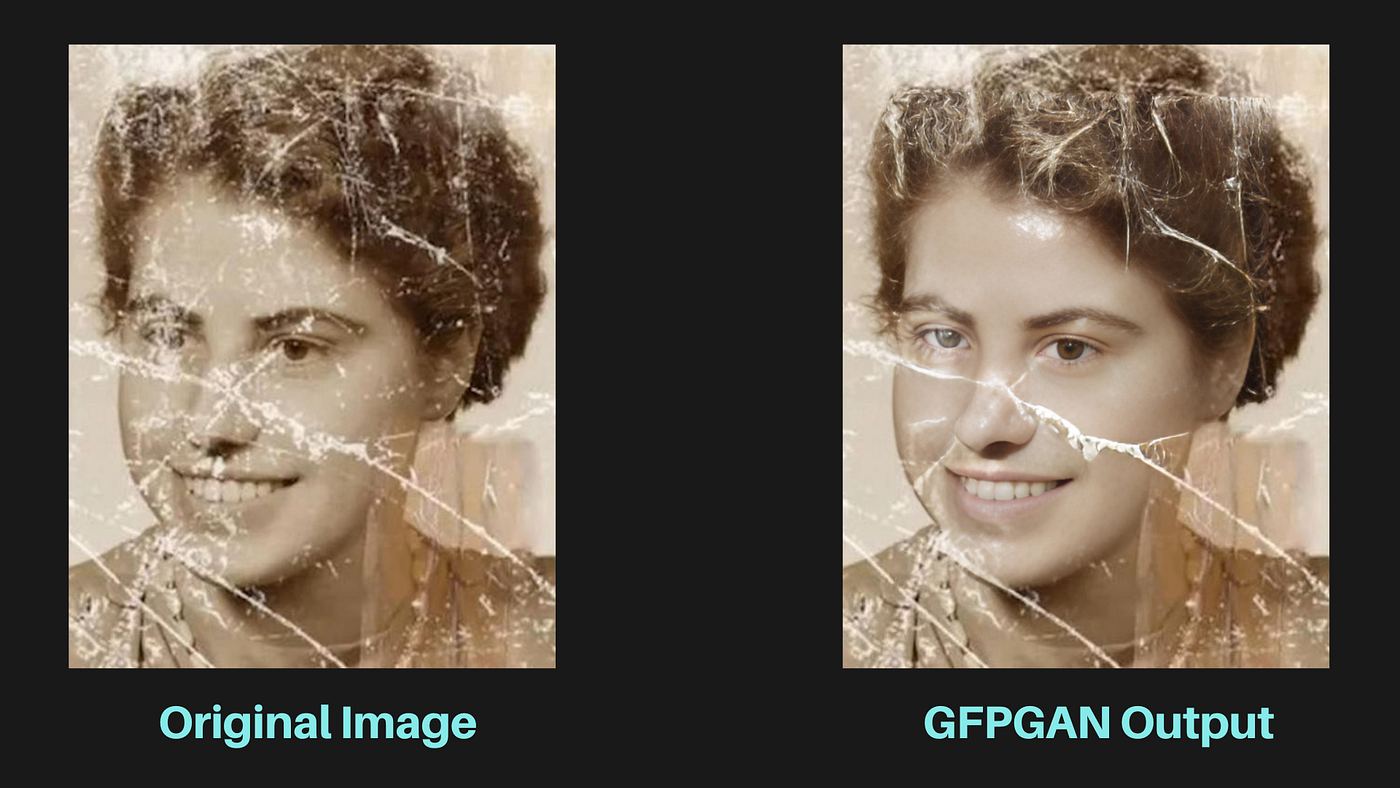
GFPGAN: Great for Faces, Weird When It Is Not
GFPGAN uses a pre-trained face GAN as a prior, meaning it has a very strong internal model of what realistic human faces look like at high resolution. When it encounters a degraded face it pulls from that prior to reconstruct realistic skin texture, eye detail, teeth, and hair structure.
On portrait photos from the mid-20th century the results are often genuinely impressive. Eyes that were soft blobs become recognizable. Faces that looked like smooth grey shapes get real texture back. For family photo restoration it’s usually the right first call.

The issue is that same prior can work against you. GFPGAN is trained heavily on modern high-resolution face datasets. When the original face has strong or unusual features, the model sometimes smooths them toward a more average-looking result. The person ends up subtly different: younger, with softer bone structure, or slightly generalized eyes. Most people won’t notice. People who actually knew the person in the photo sometimes will.
Also worth knowing: GFPGAN only focuses on faces. If you run it on a photo where the background is just as damaged as the faces, you’ll get sharp faces sitting in a still-degraded background. You usually need to pair it with Real-ESRGAN for a complete result.
Use it for: Portrait and family photo restoration where faces are the main subject.
Watch out for: People with very distinctive features, photos from before 1940 where resolution was very low to begin with, and any image where faces are not the primary subject.
SwinIR: The Overachiever Nobody Talks About
SwinIR came out of Microsoft Research in 2021 and it shifted the benchmark leaderboards. Instead of a CNN it uses Swin Transformers, originally developed for NLP before being applied to vision tasks. The key advantage is that transformers can capture long-range dependencies across an image, not just local patches. A CNN sees a neighborhood of pixels. A transformer can relate a texture patch in the top-left corner to a similar pattern in the bottom-right and use that relationship to inform reconstruction.
In practice this produces cleaner, more globally consistent results, especially on images with repeating patterns across large areas: fabric, foliage, architecture, anything where consistency matters. On standard benchmarks SwinIR consistently beats CNN-based models on output quality.
The tradeoff is compute. SwinIR is significantly heavier than Real-ESRGAN and not practical for mobile or real-time use in its current form. It’s a research and professional archival tool, not something you’d integrate into a consumer app today.
Use it for: Museum and archival restoration projects, research, any situation where quality is the only metric that matters and compute cost is not a constraint.
Watch out for: Slow processing on standard hardware. A decent GPU with enough VRAM is basically required to get reasonable runtimes.
SRCNN and Waifu2x: Two Models Worth Knowing
SRCNN is the great-grandfather of learned super-resolution. Published in 2014, it was one of the first papers to show that a CNN could outperform traditional upscaling methods. Three convolutional layers, one task, nothing fancy. It’s obsolete for production use today but understanding how it works is actually valuable if you want to follow how this field developed, because everything that came after built on what SRCNN demonstrated.
Waifu2x has a strange name and a very specific purpose. It was built for anime-style artwork and 2D illustrations, not photographs. The training data is entirely different and the model is tuned for the clean lines, flat color regions, and specific compression artifacts that come from digital art and manga scans. On that type of content it does a solid job. On real photographs it produces nothing useful. It’s a good example of why checking what a model was actually trained on matters before you run it on your images.
Head-to-Head: Which Model Does What
| Model | Architecture | Best Input Type | Compute Cost | Practical for Apps? |
|---|---|---|---|---|
| Real-ESRGAN | GAN | Any real-world photo with complex damage | Low to medium | Yes |
| GFPGAN | GAN + face prior | Portrait and face-focused images | Medium | Yes, pair with Real-ESRGAN |
| SwinIR | Transformer | Archival work, complex repeating textures | High | Not yet |
| SRCNN | Early CNN | Learning purposes, simple upscaling | Very low | Outdated for production |
| Waifu2x | CNN | Anime and 2D illustration only | Low | Yes, for its specific use case |
Stop Picking Randomly: Here’s What Fits Your Use Case
Most articles give you a list of models and say pick the one that sounds right. Here’s a more direct breakdown based on what you’re actually trying to do.
You found a box of old family photos and want to restore them:
- Run GFPGAN first on any image where faces are the main subject
- Then run Real-ESRGAN over the full image for background and overall sharpness
- Use moderate settings on both: maxed-out enhancement usually looks over-processed
- Cross-check restored faces against any other known photos of that person before treating the result as accurate
You are building an app or API that handles user-uploaded photos:
- Real-ESRGAN as the baseline: handles the widest range of real-world input quality
- Add GFPGAN as a conditional step triggered when face detection finds a face in the image
- Both have well-maintained Python implementations that run on consumer GPU hardware
You are doing archival or museum restoration work:
- SwinIR for maximum output quality on critical images where you have the compute budget
- Document exactly what model, version, and settings you used: provenance matters in archival contexts
- Seriously consider whether enhancement is appropriate at all, or whether preserving the original degradation is more historically honest
You are a student learning how image restoration works:
- Start with SRCNN: the architecture is simple enough to understand end-to-end without getting lost
- Then move to Real-ESRGAN and read the original paper alongside the code
- The gap between SRCNN and a modern model like SwinIR shows you exactly how much the field moved in under a decade
The Honest Limitations Nobody Puts in These Articles
Every article about AI photo restoration eventually calls the results something like “jaw-dropping” or says it feels like magic. Here’s what tends to get left out.
These models hallucinate. That is not an insult: it is the actual technical term for what they do when they generate detail that wasn’t recoverable from the original image. On most photos that’s fine and the output looks good. On a photo where accuracy genuinely matters: identifying someone, legal or forensic use, historical documentation: it’s a real problem. You are looking at the model’s best statistical guess, not a recovered truth.
The results are also more sensitive to input quality than most tools admit. Two photos that look equally damaged can produce very different restoration quality depending on the specific type of degradation, the original resolution, and whether the damage pattern matches what the model was trained on. There’s no reliable way to predict this without just running it.
And none of these tools work on truly destroyed images. If a face is a featureless blur, GFPGAN will produce a face: but it will be a statistically plausible face fitted to the available context, not the actual person. Worth being clear about that before showing the result to someone who knew them.
Final Verdict
For most people restoring family photos: GFPGAN for faces paired with Real-ESRGAN for everything else. That combination covers the majority of real-world use cases and both run on a standard machine.
If you are building something: Real-ESRGAN is the most practical starting point. Well-documented, widely integrated, handles real-world input quality better than most alternatives. Add GFPGAN as a conditional face restoration step and you have a solid pipeline without overcomplicating it.
If you are doing serious archival work: SwinIR is worth the compute cost, but be honest in your documentation about the fact that enhanced outputs are reconstructions, not recovered originals. That distinction matters more than most people working in this space acknowledge.
The best way to actually understand any of this is to run one of these models on a real photo and look carefully at what changed and what didn’t. The results are often genuinely good. They’re also sometimes wrong in instructive ways that tell you more about how these systems work than any benchmark table will.
If you’ve used any of these on real photos, drop a comment with what you ran and how it went. First-hand results are more useful than anything else in this space.
AI did not restore your photo. It made a very confident guess.
Knowing the difference is what makes you use it right.


Leave a Reply